DJI O4 Lite Lens Mod

So you scratched your FPV camera lens (yep, I did too). I tried polishing mine, but since it was plastic, I only made it worse. Instead of giving up and buying an entire new o4 Air module (they don't sell the camera separate), I decided to design a 3d printed housing and swap in a new M12 lens. Here’s how you can do it too!
Upsides
Wider FOV
Replaceable lens
Arguably cooler looking drone
Downsides
Extra weight
Slight color/hue variation in center of image
Slight blurring at edges of image
Easy to get dust on sensor during install
Supplies
RunCam RC25G FPV Lens (with IR filter left on)
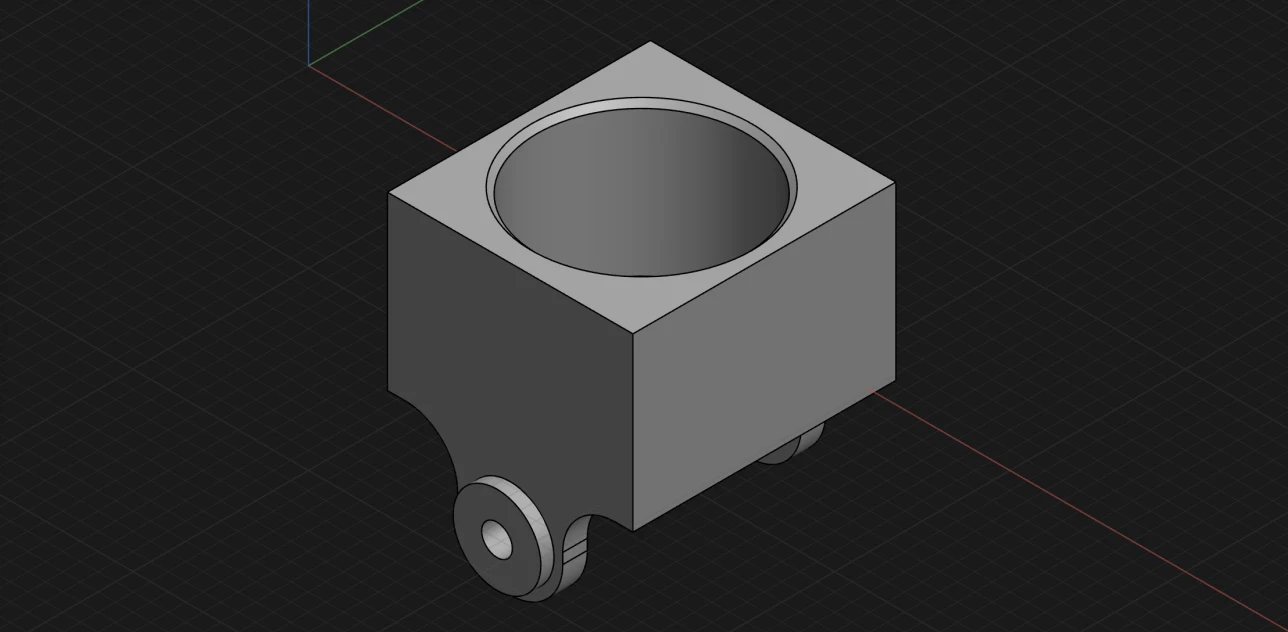
3D printed housing (PETG recommended)
T-7000 glue
Tools
3D printer (or access to one)
Heat gun
Pliers or a vice
Torch or lighter (optional, for cleaning stringers)
How to Guide
Step 1: Print and Prep the New Housing
Print your replacement camera housing in PETG for durability.
Remove stringers or leftover filament. A sharp blade works, but a quick pass with a torch can burn away fine strands. Don’t overheat or warp the part.
Use the M12 x 0.5 machine thread tap to cut threads into the housing so the lens will screw in smoothly.
Clean the piece really well to avoid getting plastic dust on sensor.
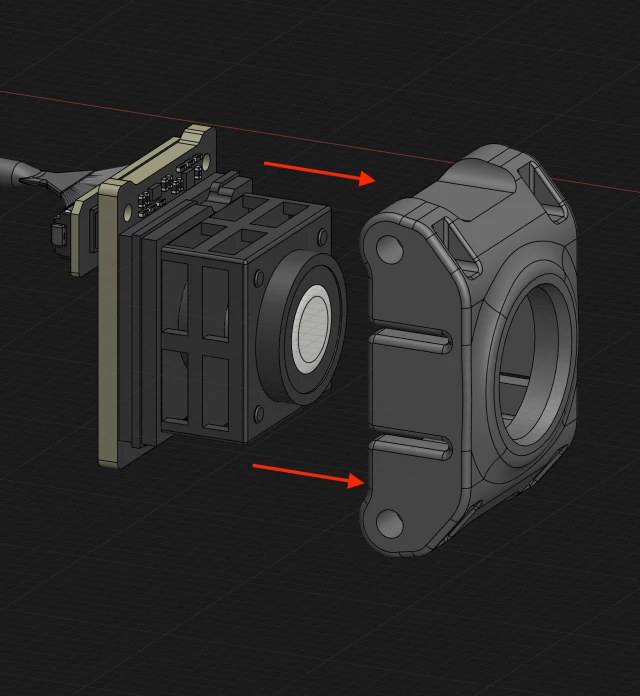
Step 2: Remove the Old Camera Housing
First remove the camera mounting bracket like in the first picture below or the soft mounting bracket if you have a Meteor 75 Pro.
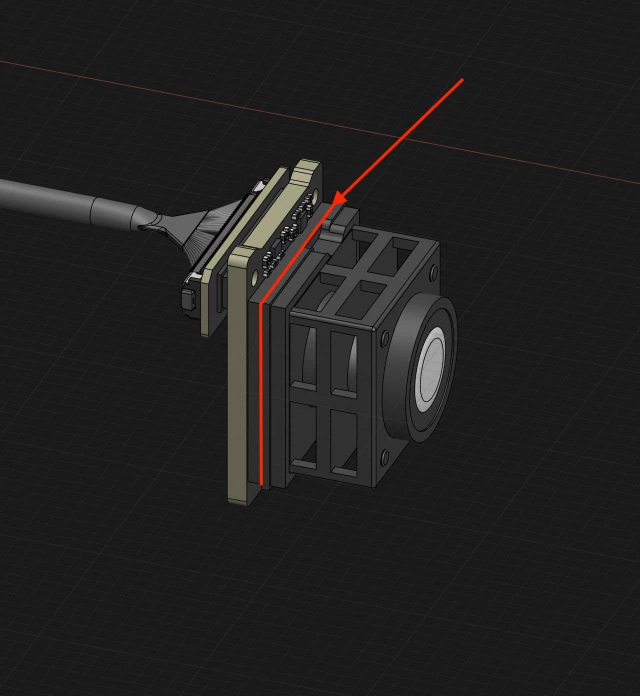
Then use a heat gun to gently warm the original camera housing. Don’t overdo it, just enough heat to soften the glue. You don't want to destroy the sensor with heat.
Once loosened, carefully pry it off using pliers or a vice. It should come off with minimal effort if the heat is right. Start low and re-heat is better than toasting the thing right from the start. The second image shows red lines where the two pieces separate.
Step 3: Install the New Housing
Dry fit the new 3D printed housing to make sure it lines up with the camera board.
Apply a thin bead of T-7000 glue around the sensor edges.
⚠️ Important: Do not touch the sensor or get glue on it!Press the housing onto the camera board.
Let it cure for 24 hours before moving on.
Step 4: Install the Lens
Once the glue has set, thread the RunCam RC25G FPV lens into the housing.
I left the built-in IR filter in place. The colors look accurate.
Step 5: Mount in the Meteor 75 Pro Canopy
Place the finished camera into your Meteor 75 Pro canopy.
Check the fit and make sure everything is aligned securely.
Fire up a battery and put on your googles. Everything will probably be blurry. Adjust the focus as needed by screwing the lens in or out.
That’s it, you’re ready to fly again!
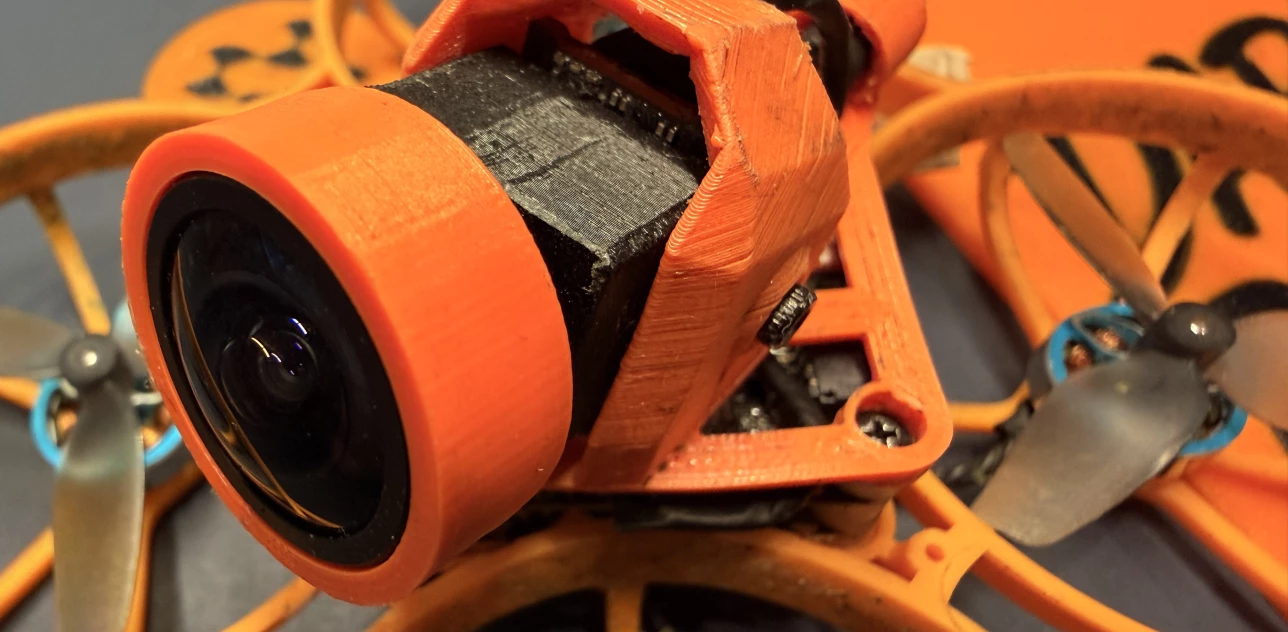
A simple 3D-printed mount and a new lens turn a damaged O4 Air into something better than stock IMO. The threaded design makes future repairs easy and has good image quality. At least good enough for my tinywooping purposes.
Custom Gyroflow Lens Profile
If you want to use Gyroflow to stabilize your footage, you'll need a custom lens profile since the stock O4 Air profile won't work with the RunCam RC25G's different focal length and field of view.
I created a lens profile specifically for this mod:
RunCam RC25G Lens Profile for DJI O4 Air Focal Length: 2.5mm
Field of View: 140°
Frame Readout Time: 15.5ms (estimated for 4K60)
How to use it:
Download the lens profile JSON file: Download RC25G Lens Profile
In Gyroflow, go to Lens profile → Load preset
Navigate to the downloaded JSON file and select it
The profile will automatically apply the correct distortion correction and frame readout time
The wider 140° FOV of the RC25G gives you more room for stabilization cropping compared to the stock lens, which is a nice bonus when running aggressive smoothing settings. Check out the video below for the results.
Available in the Shop
We sell a pre-printed DJI O4 Lite Lens Mod kit in our shop if you don't have a 3D printer.
Related Blog Posts
GEPRC Cinelog 30 v3 Custom Build
Explore our custom-built Cinelog 30 V3 setup, designed for smooth cinematic FPV flights. We break down the components, upgrades, and tweaks that make this build lightweight, durable, and perfect for capturing stunning aerial footage.

GEPRC Cinelog 30 v3 3d Printed Case
Download a free STL file for a 3D printed GEPRC Cinelog 30 V3 case. Durable, easy to print, and custom fitted. Protect your drone while in transport.